
digital drifting settings
wheels
Aaaarrrrrrggggghhhhh! Everything is installed but NONE OF IT WORKS!!!!!
That’s okay, we can help you with that!
Thrustmaster t300, t500, TS-PC, T-GT, and TS-XW

Thrustmaster’s TS-PC; currently the best wheel in their stable for drifting.
So you’ve got something from the Thrustmaster stable? Good stuff! There’s loads of different options from Thrustmaster that give great response and, incredibly, the basic setup for all of them is very, very similar! We’ll highlight the specific differences as we go, but unless we do that you can assume that these are great drift settings for your Thrustmaster wheel.
Thrustmaster have made life very easy for everyone by handily grouping all of their wheels under a simple heading of “Force Feedback Wheels” and the guys over at BSimRacing did us all a huge favour by grouping them together in one article so:
GO GET YOUR LATEST DRIVERS FOR YOUR THRUSTMASTER WHEEL!
Make sure it’s the correct driver, obviously, and that you’re happy with which wheel you’re using when setting up your Thrustmaster. The T500 is the oldest of the wheels in our guide but, for pure drifting, we feel it actually outperforms it’s replacement; the T300. Sadly, that means the T500 isn’t on sale any longer and the wheel that’s ACTUALLY a step up from it in the new format is the TS-PC. The internals for the TS-PC are basically the same as those found in the TS-XW and T-GT, it’s just that the TS-PC is the cheapest for us as it’s ONLY licensed for use with PC. The TS-XW works with XBOX consoles as well as PC and, conversely, the T-GT works with PlayStation consoles in addition to your trusty home desktop. We haven’t mentioned settings for the T150 in this guide because, frankly, out of the box it’s as good as it’s getting almost, although some of the tweaks you’ll find lower down such as the .LUT guide and CM settings will still be applicable!
T500 Specific Step:
Before we get into the actual settings for the wheel in the Thrustmaster Settings we’re going to start by giving it half a chance of performing to it’s best. To do that we’re going to need to generate a .LUT file. This is being done for YOUR SPECIFIC WHEEL and is ONLY NECESSARY FOR THE T500, not for all Thrustmaster wheels in general. If you change your wheel from, say, a T500 to a TS-PC as a small upgrade then you will not need to do this step again, however you will need to remove the LUT from a later setting. However; if you replace your T500 with another T500 then you’ll also need to do it again! It’s important to understand that this tool is to even out the imperfections in the gear cogging and motor cycle for each individual wheel, not as a general fix-all.
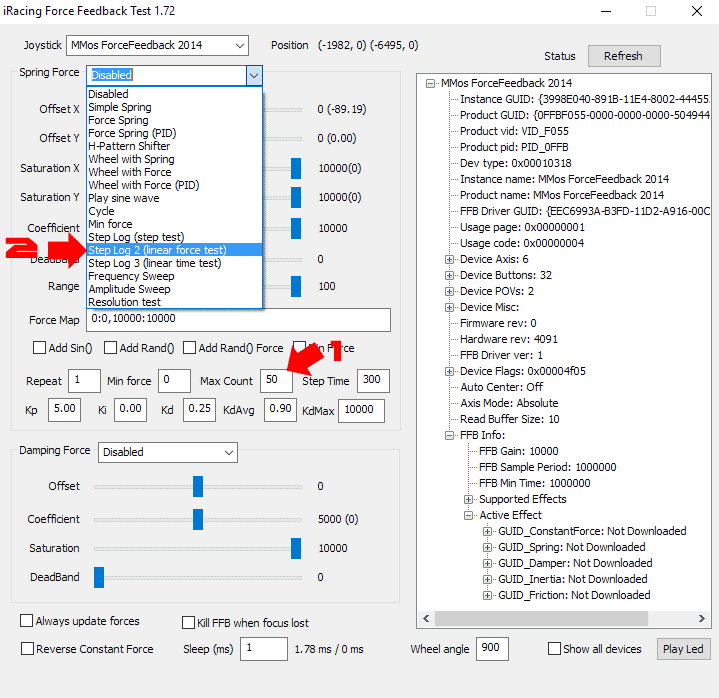
The 2 steps for running Wheelchecker; Max Count and Linear Force Test
The first step is to use an app called Wheelchecker. This is a piece of software that will put your wheel through a pre-defined set of movements, each with increasing violence; from totally imperceptible through to “holy crap, it’s about to remove itself from my desk!”. The idea is that the software is inputting a certain amount of energy to the motor of your wheel and then measuring exactly how much of a movement in the wheel itself that input generates.
When you open Wheelchecker then the first action is to set the “Max Count”. The higher this number is (within reason) then the better your eventual .LUT will be. Other guides for this recommend 50 as the minimum to put into this box (and that’s what’s shown in the image attached) but we recommend 100 as your minimum, but we have gone as high as 200 and seen a noticeable improvement. Effectively all that happens here is that the length of the test will increase depending on the number you set.
Next; ensure that your wheel is plugged in and has gone through it’s calibration cycle on initial start-up (the aggressive rotation from one extreme to the other that the wheel does when it has both power and a USB connection). Then, using the “Spring Force” drop down bar that currently says “Disabled”; select “Step Log 2 (Linear Force Test)”. The moment that is showing in the drop down bar next to “Spring Force” the test has started!
IMPORTANT: Initially it will seem as though nothing has happened. It is essential, at this stage, that you DO NOT TOUCH THE WHEEL!
The Wheelchecker has started it’s cycle but the first 30 seconds to 1 minute of movement will be totally imperceptible to you. If, after 1 minute, the wheel has not moved at all (assuming you haven’t set more than 200 as your “Max Count”) then it is time to close Wheelchecker and begin the process again. It should be making obvious and noticeable movements within 30 seconds to 1 minute and, once they start, you just have to wait until they stop. Once the wheel has stopped moving then the test is complete and you can shut the Wheelchecker App.
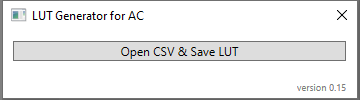
The .LUT generator exe when it first opens.
So; now you’ve got a .csv filelocated in your “Documents” folder. To make this into something useful you’re going to need to use the .LUT Generator. This will open a simple app that says “Open .csv and save .lut”. Click that, find the .csv file you recently generated in your “Documents” folder and select it. The LUT Generator will then ask you to specify a filename and location for the new .lut. It’s important to make a note of these as you WILL need it later in the process. We recommend saving it as something like “logitech.lut” in My Documents/Assetto Corsa/cfg. It’s the default location AC uses for this type of file and will already contain a .lut called “crazy1.lut”.
That’s everything we need to do in the background in preparation for setting up the actual wheel properties and Assetto Corsa settings. We’ve recommended doing it in this order so that you’ve got all the fiddly things done in the background ready to go first, then working through to finish with Content Manager so that you can just go straight into the game once this whole process is finished!
All Thrustmaster Wheels:
It’s time to open the Thrustmaster Control Panel. If this is the first time you’ve opened the software, as suggested by the way we’ve structured this guide, then everything in your Global Device Settings should look something like the “default” image below. This is good. We aren’t going to touch the “Overall Effects Strength” slider as we want that on 100%. NOTE: If it isn’t on 100% at this point you will need to SET IT to 100% and then RE-RUN WHEELCHECK AND CREATE A NEW .LUT!

Thrustmaster Control Panel for setting force feedback
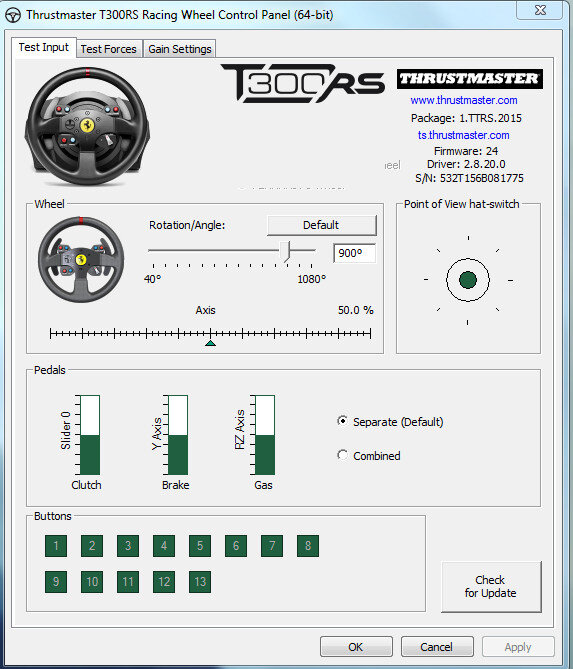
All we want to adjust are the “Spring Effect Strength” to 100 & the “Damper Effect Strength” slides both to 15. then tick “Allow Game To Adjust Settings”. That’s it here, click “OK” and close the Thrustmaster Profiler!
Lastly we’re going to set everything up in Content Manager. This can be done in Assetto Corsa itself if you’re absolutely determined to do so but, as we’ve said elsewhere, Content Manager will make everything far easier.
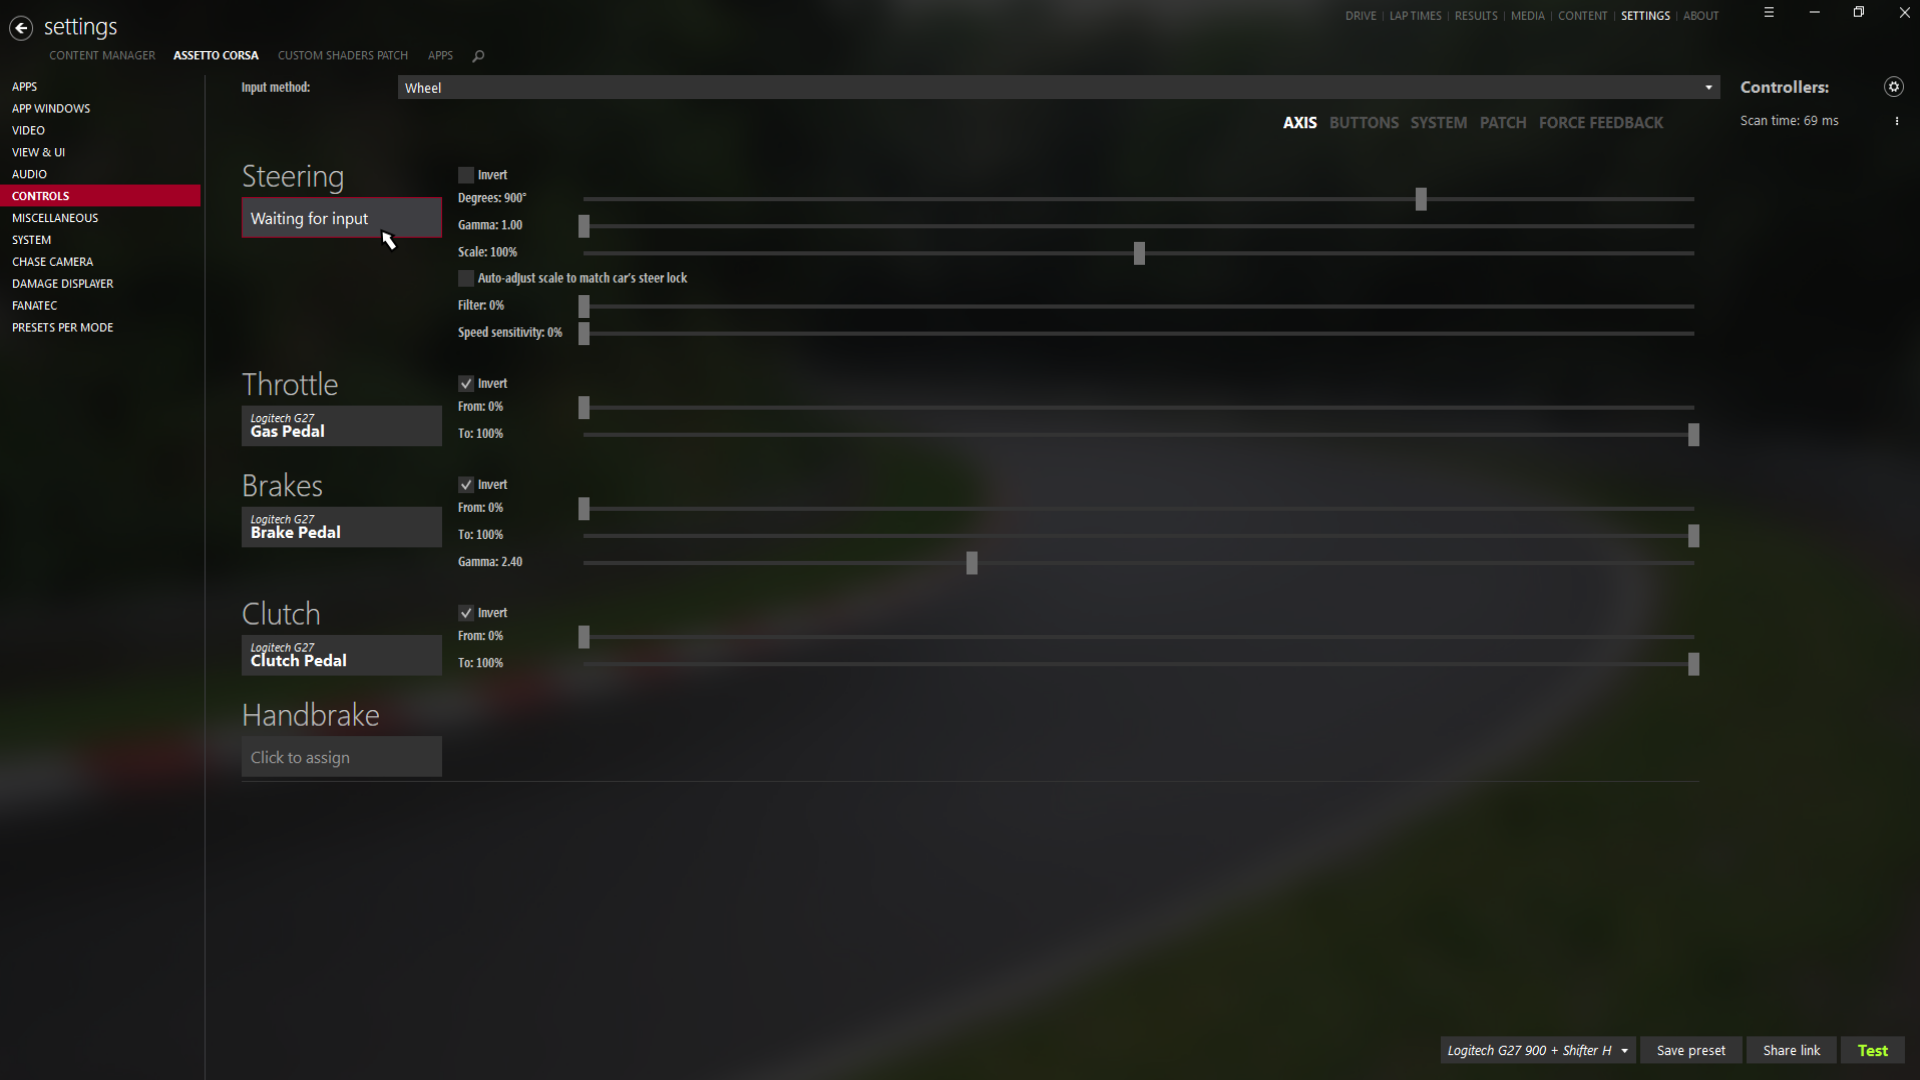
Content Manager showing the “Steering” selected, waiting for input from the wheel.
In CM head to the “Settings” tab in the top right, then select the “Assetto Corsa” menu header on the left hand side of the screen. From there click on “Controls”. The default screen for the “Controls” tab is the “Axis” section and this will all need to be assigned.
To assign a control, click on the box for the part you want to assign. In the image associated we’ve clicked on the “Steering Wheel” box, as can be seen from the red surround on the box and the text “Waiting For Input”. To assign the relevant control just move the item you want it to be! In this instance it would just mean a small movement of the steering wheel.
Repeat that process with each of the pedals individually and then, as can also be seen in the associated image, ensure that each pedal has the “Invert” tab ticked.
Once each of these has been assigned you should be able to move each item (wheel, clutch, brake, and throttle) and see a corresponding movement on screen. In the case of the pedals this should be from left to right! If they are moving from right to left when you depress the pedals then check again that the “Invert” tab is ticked.
If you have a physical handbrake you intend to use then assign that in the same way as the pedals at this stage. If you don’t then read on below to see how to assign a button as your handbrake.
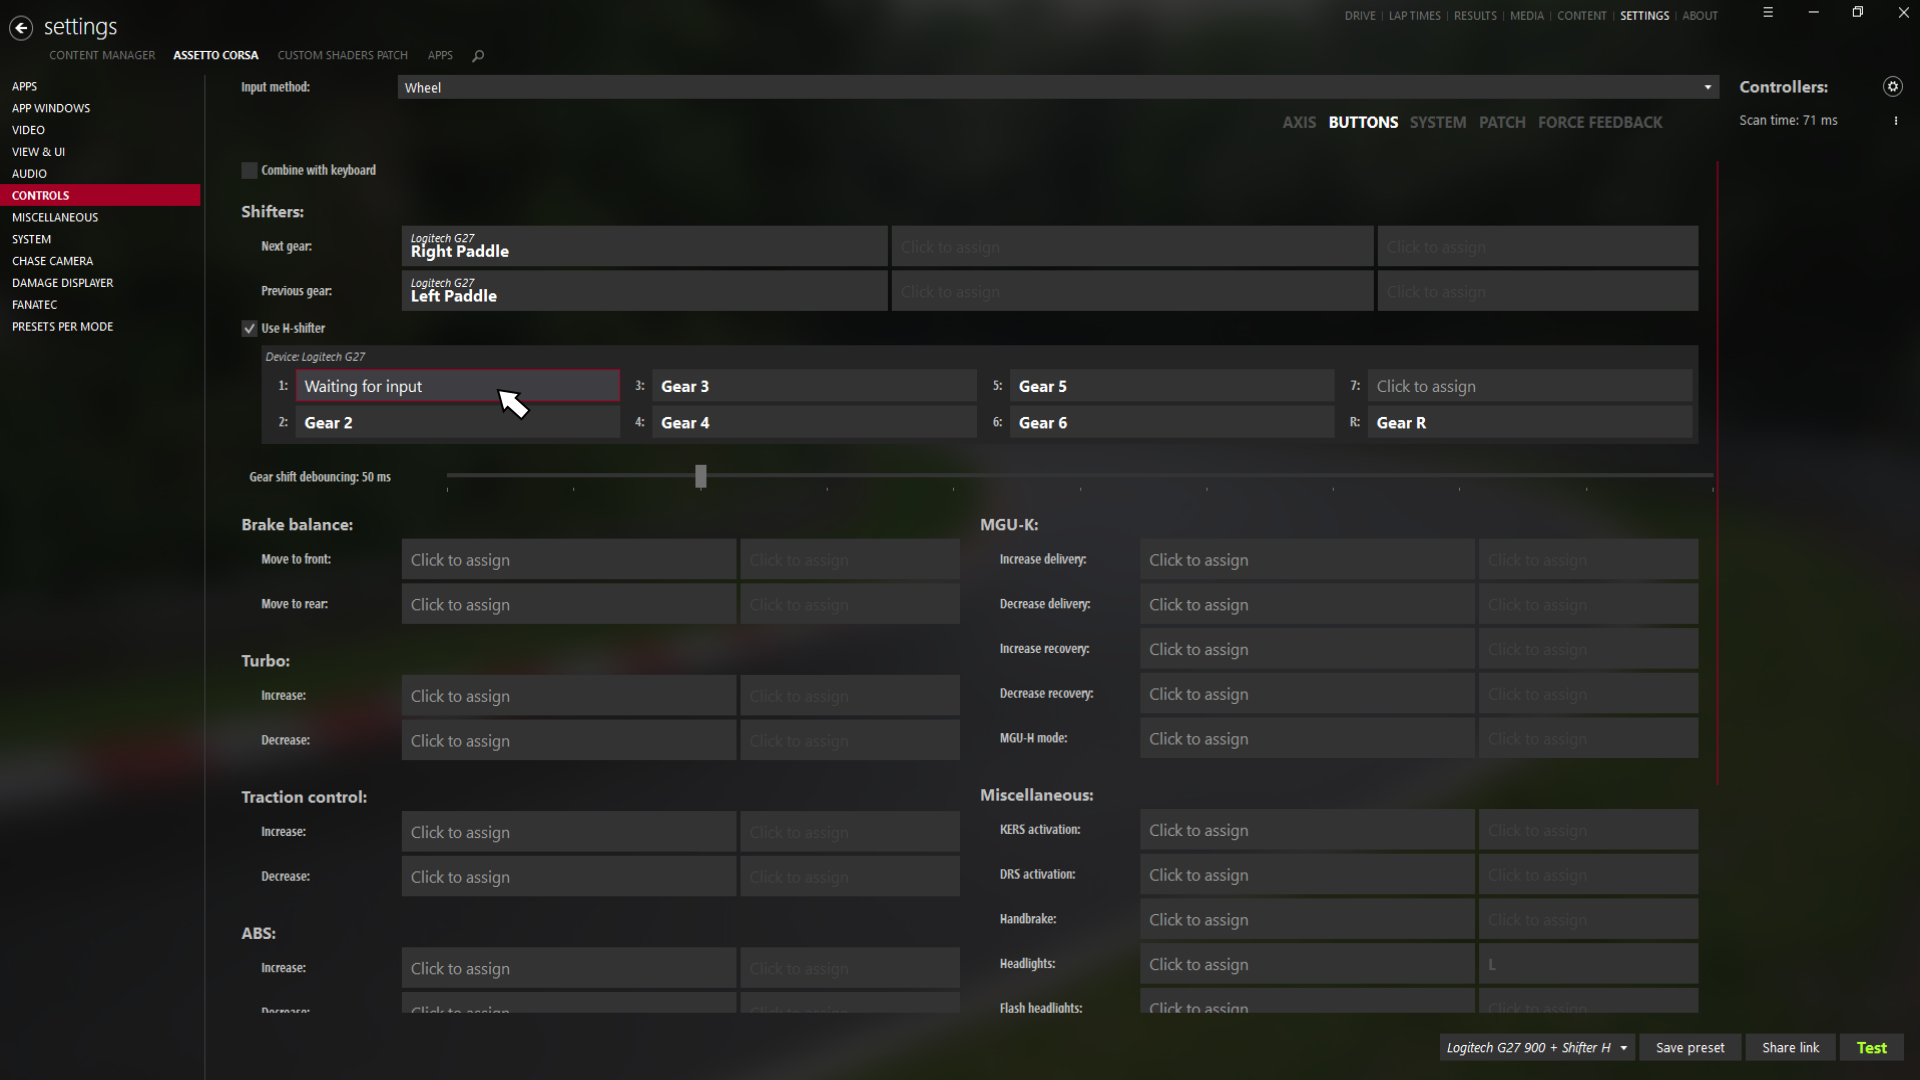
The “Buttons” page showing the box for 1st Gear awaiting input from your shifter.
Next, we move on to the “Buttons” tab on the right hand side of the upper-screen. This will allow us to set a few useful things. First of all it will allow us to set the gearbox up. As you can see from the image associated with this the process is the same as for the steering wheel and throttle; click on the item to assign and then select the gear you want on your shifter (assuming you have a shifter attached, which you should do with the G-Series wheel).
Once you have assigned 1st - 6th (and reverse!) then there are a couple of other useful things that can be assigned on this screen. These can be found under the “Miscellaneous” header on the right hand side. Lights and horn are all useful on drift servers as a lot of servers now run night events and the lights on your virtual car aren’t automatic, plus the horn is useful to give a little “toot” of apology after accidentally locking up a wheel and smashing the door or quarter in of the car you were chasing!
Lastly here; assign a button for your handbrake if you haven’t got a USB handbrake or joystick. It’s possible to use a shifter on the back of the wheel, although obviously these do move. Something that’s always in the same place and easily reachable is recommended. The older Logitech shifters have a button box on them that’s perfect for this use, failing that people have used spacebar on their keyboard. Find something that works for you.
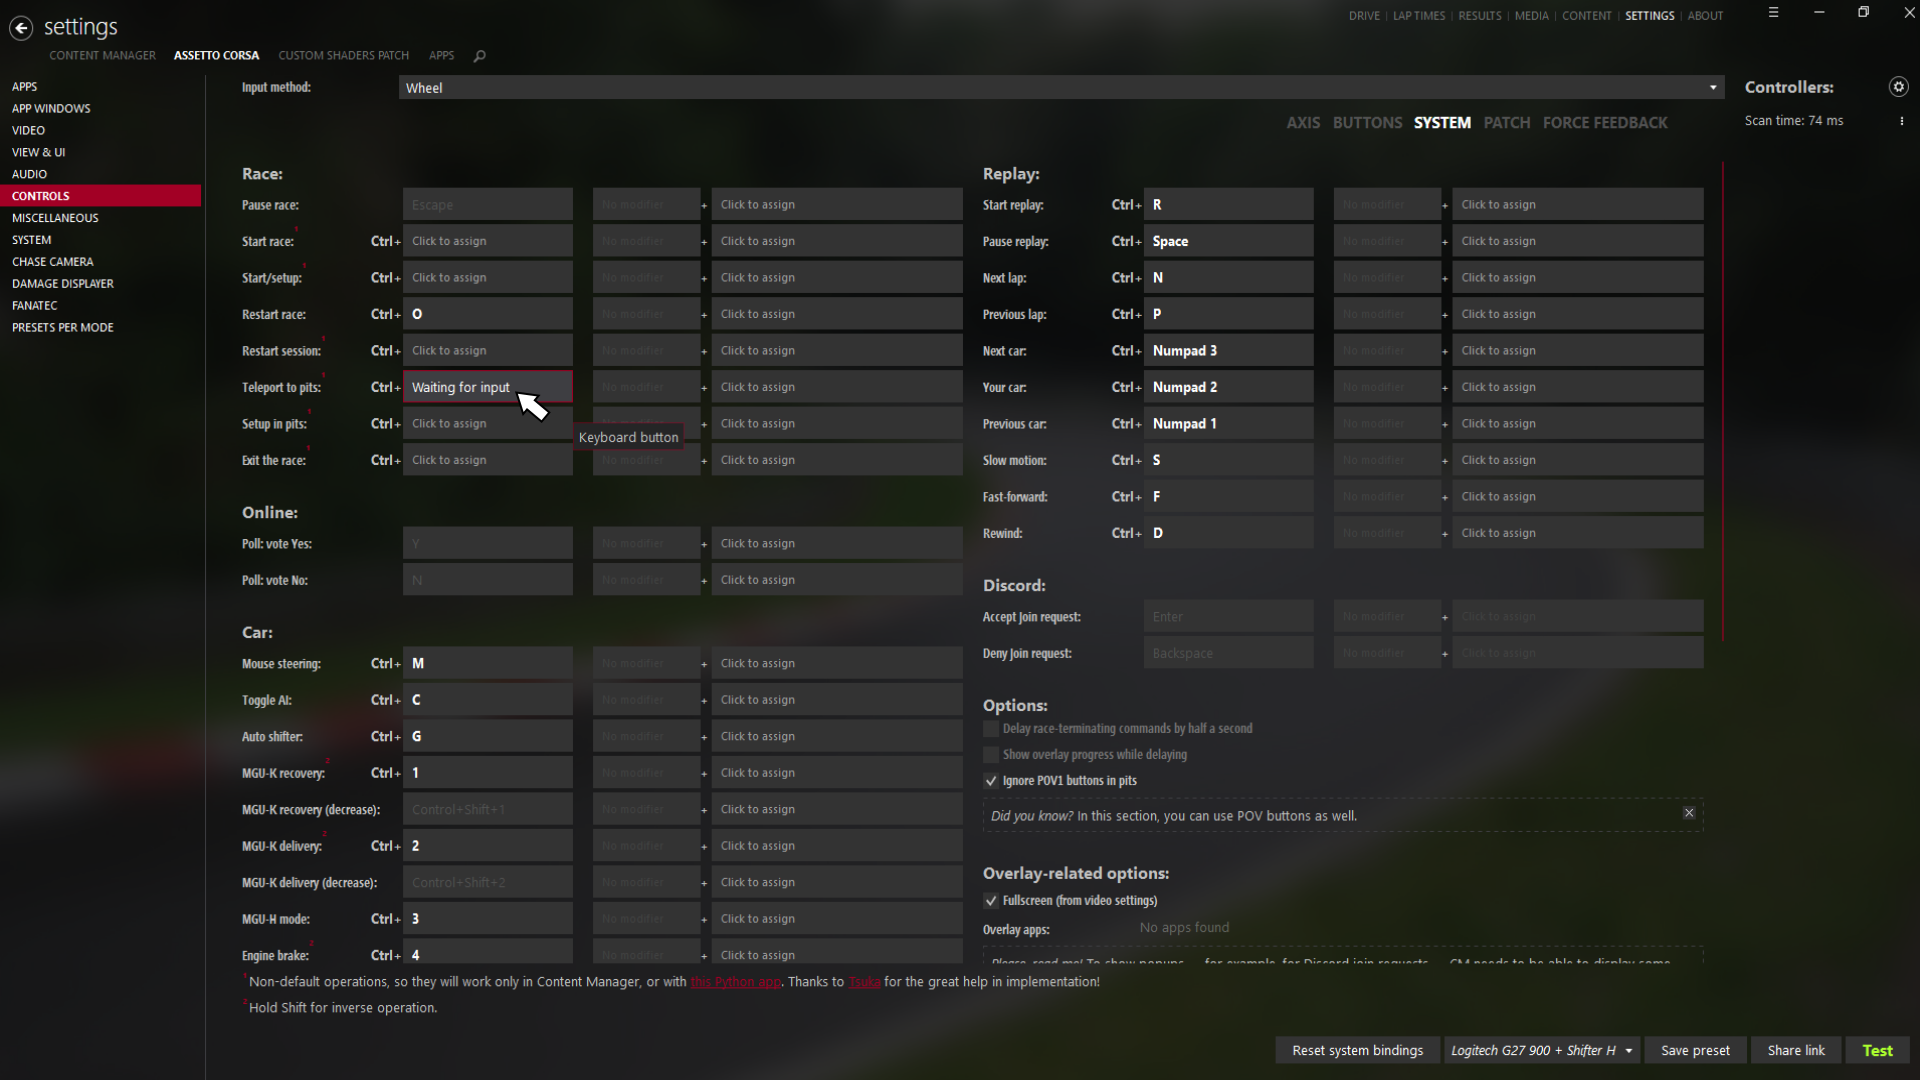
Assigning the “Teleport to Pits” buttons in the “System” tab; an incredibly useful button!
The next header over is the “System” tab and, thankfully, there’s only one item here that really needs to be set up. That’s the “Teleport to Pits” button.
This is incredibly useful whilst learning to drift offline as it allows you to immediately port back to the pits and get a fresh car with fresh tyres after you’ve been practicing your donuts and figures of 8. It’s even more useful when online and you realise you’ve made a mistake in the lead of a 5 car train! Being able to teleport out of the way rather than take everyone in your immediate vicinity into a wall is a massive saving grace!
There are obviously a number of other items here that might become useful at another point, especially if you’re looking to also do some racing with your copy of Assetto Corsa. As we’re only focused on setting everything up for best performance drifting at the moment, however, you can comfortably ignore all of these.
Don’t worry, only a couple more tabs and settings to go before we’re ready to get out and start learning to skid on AC! Going through all these various pages now and ensuring everything is right will pay off long term as you shouldn’t have to change any of these again!
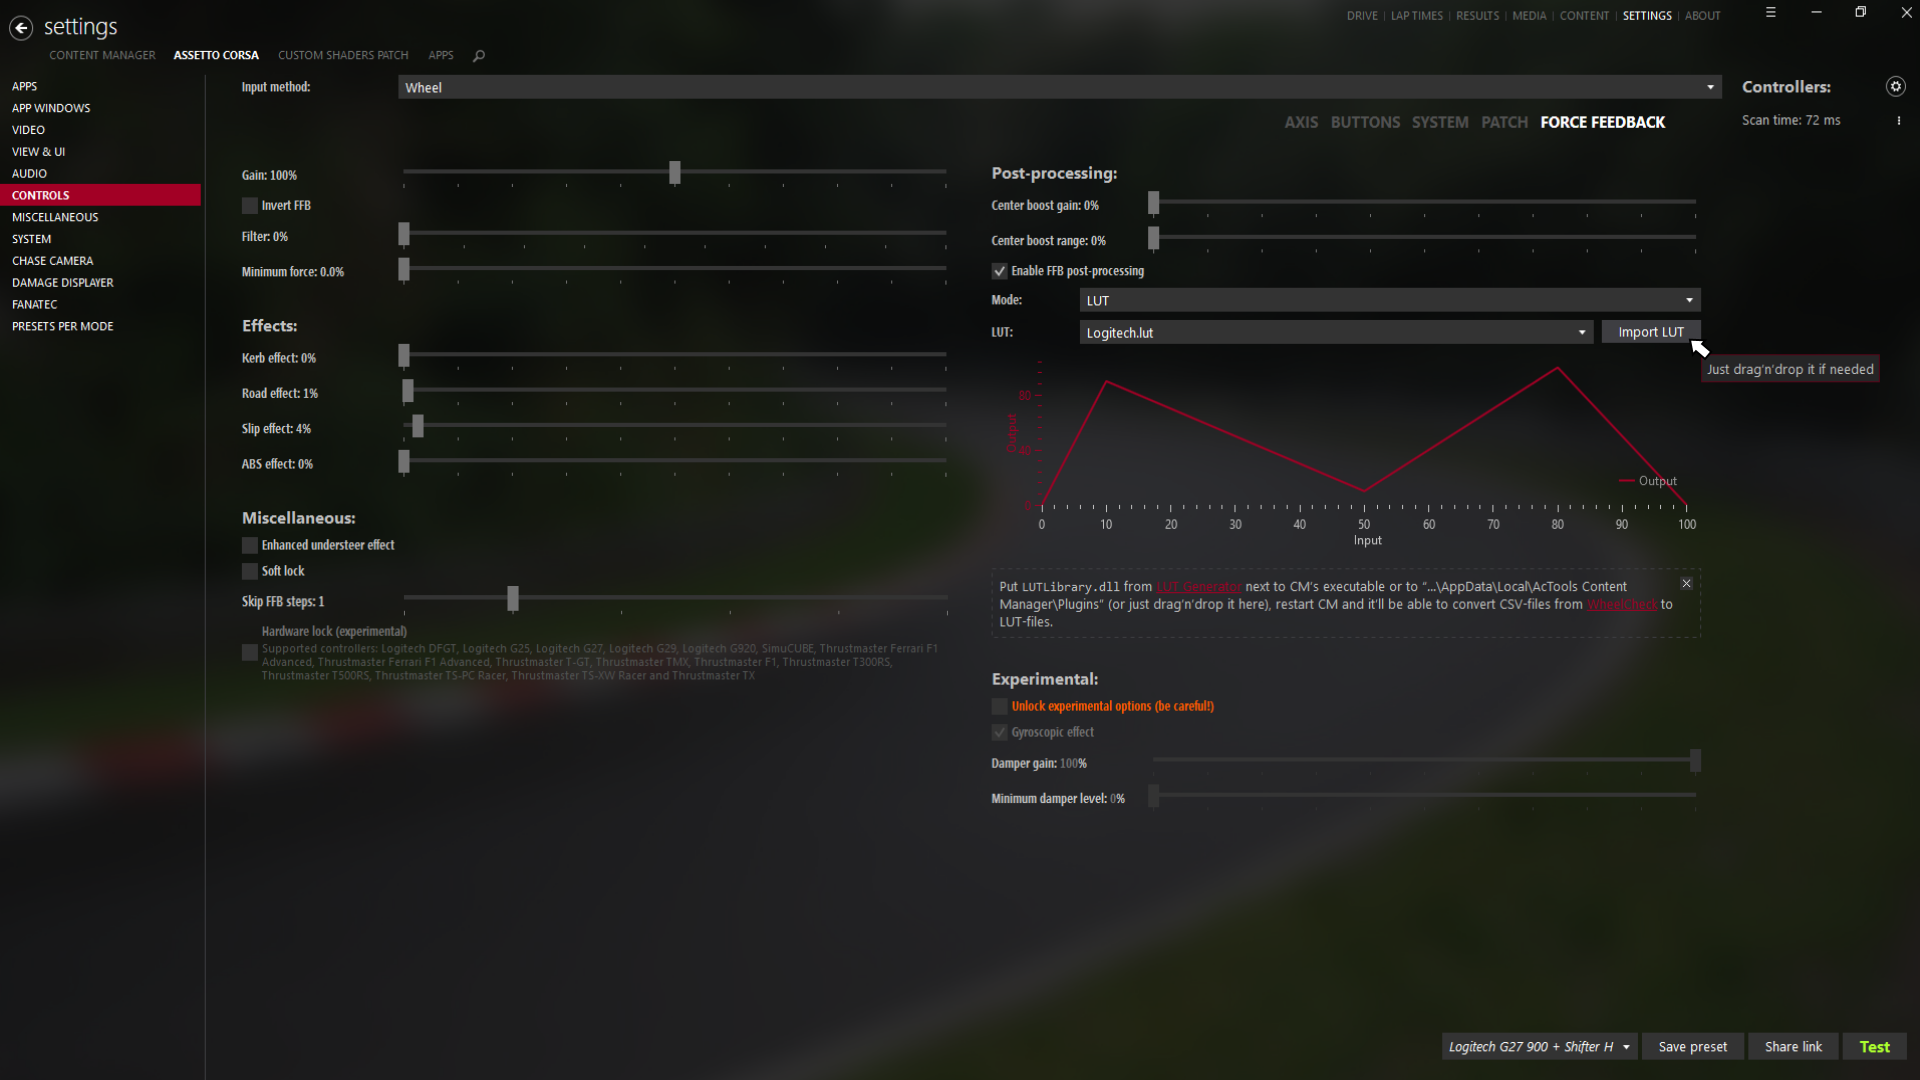
All of your FFB settings and your .LUT setup can be seen here
There’s nothing we need to adjust on the “Patch” tab so we’re going to skip across that straight to “Force Feedback”. This is where we’re going to have to bring in that .LUT file we generated earlier so make sure you remember where you put it and what it’s called! Start by setting the FFB as follows:
Gain - 100%, Invert FFB - Unticked, Filter - 0%
Minimum Force - 0.0%, Kerb Effects - 0%, Road Effects - 0%, Slip Effects - 0%, ABS Effects - 0%.
Enhanced Understeer - Unticked, Soft Lock - Unticked, Skip FFB Steps - 1 (unless on a T-GT, TS-PC, or TS-XW - on these wheels this can be set to 0)
Centre Boost Gain - 0%, Centre Boost Range - 0%
Enable FFB Post Processing - BIG FAT TICK!!!!
This last one is the item that allows us to select our previously generated .LUT if we are using a T500! The “Mode” drop-down will default to “Gamma” but change it to “LUT” and a window will appear, usually pre-populated with “Crazy1.LUT”. Click “Import LUT” and find the .LUT you generated earlier. That will then become the FFB reference LUT for AC. This will make the largest difference of all our settings so far, so make sure you do this!
Lastly on this page; “Unlock Experimental Options” should be unticked.
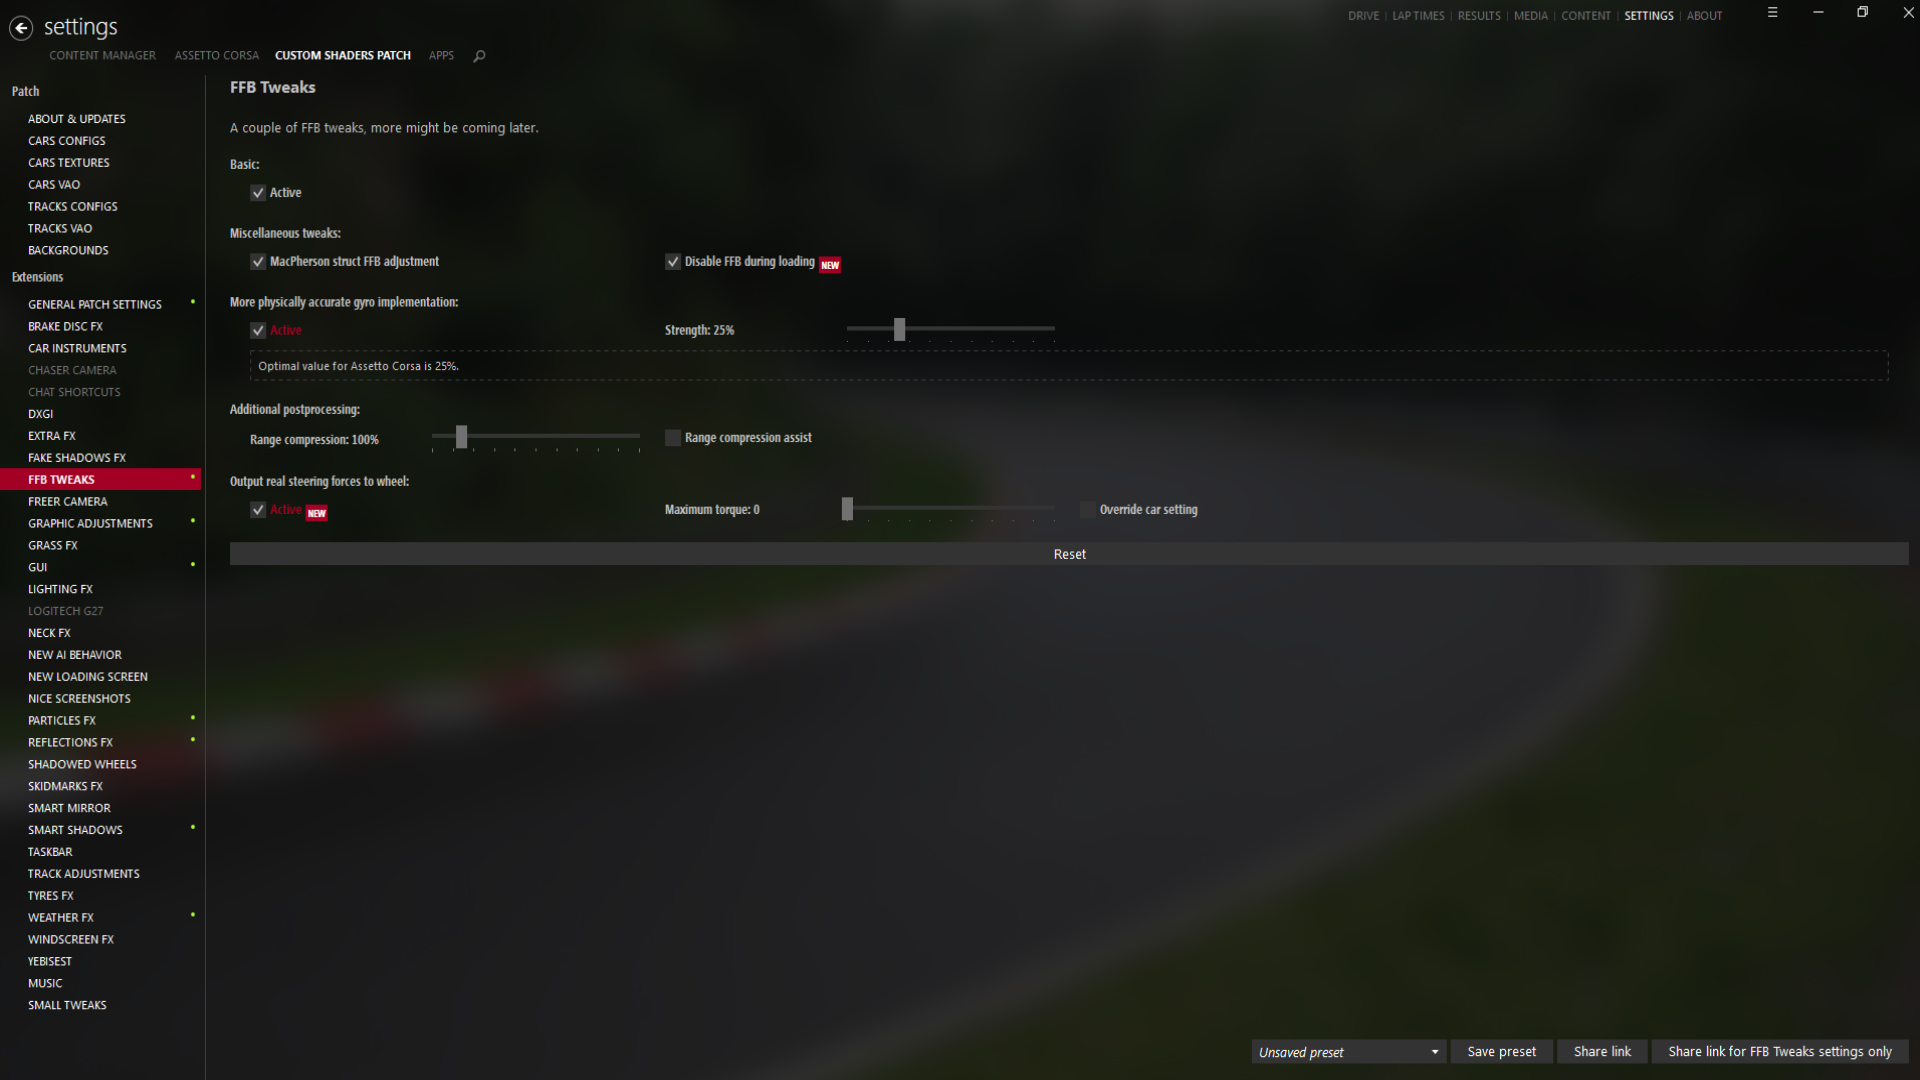
FFB Tweaks in Custom Shaders Patch helps the wheel to feel more like a real car.
One final thing and you’re all set! In the top left of the settings page click on “Custom Shaders Patch” and the find “FFB Tweaks” in the long list on the left hand side of the page.
In the “Basic” section at the top of the page make sure that the “Active” box is ticked, as well as the “MacPherson Strut” tickbox below it. You may, or may not, have the “Disable FFB During Loading” tab depending on which version your Custom Shaders Patch is, as this gets updated regularly.
The most crucial here is the “More Physically Accurate Gyro Implementation”. That needs to be ticked on and the slider set to 25%.
If you have them leave “Range Compression” at 100% and turn “Output Real Steering Forces To Wheel” to Off.
That’s it. You should be all setup with your wheel running the best settings we’ve found over the years! Time to head to “Drive”, find yourself a car and track, and go skidding!
If you have any problems with the wheel, and re-tracing the steps in this guide doesn’t help, then obviously you can ask any follow up questions via our trusty Discord!
Happy skidding, and remember; Be More Duck!